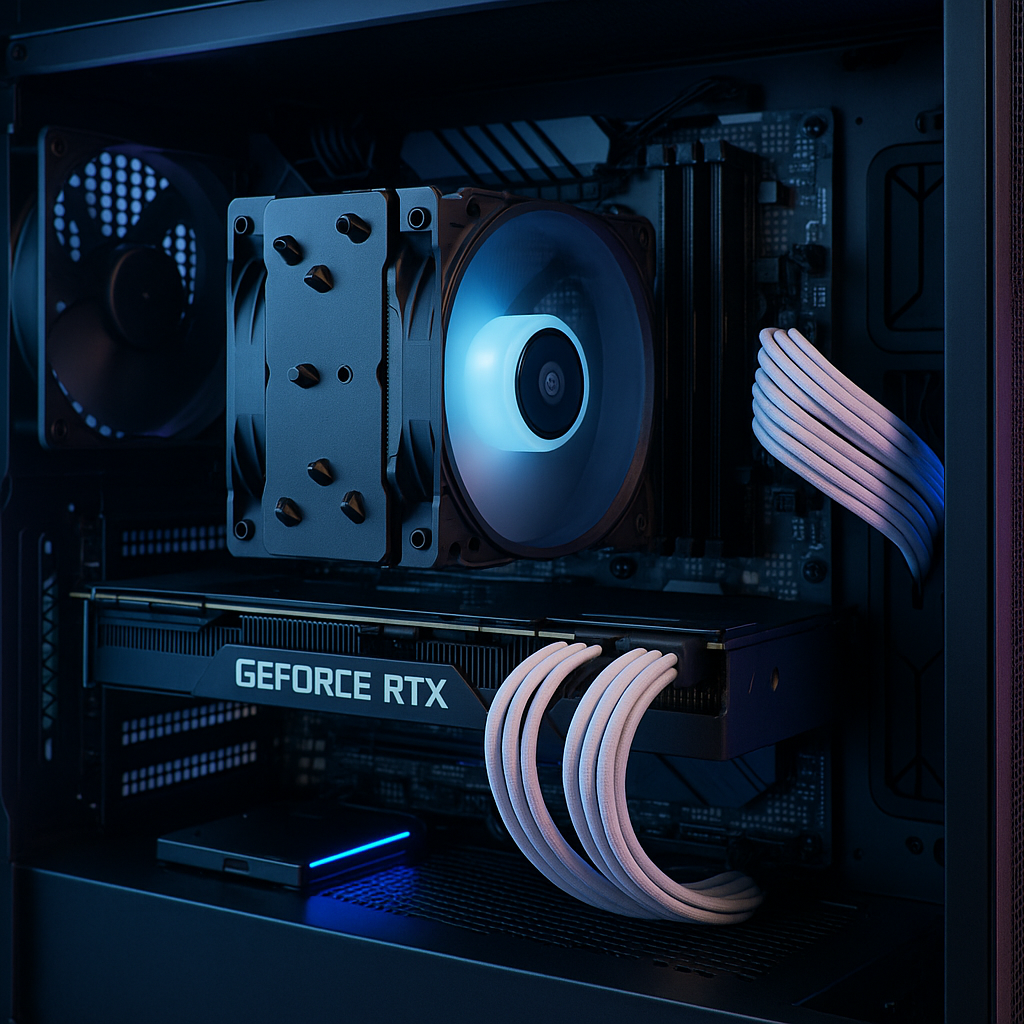
How to Build a Custom PC in 2026 – Parts List, Steps & Pro Tips
By: pcbuildhelper Editorial Team | Updated: Jan 7, 2026
Why Build a PC in 2026?
Building your own PC has always been the gold standard for performance and value, but in 2026 the advantages are more pronounced than ever. The latest CPU and GPU generations from AMD, Intel, and NVIDIA have set a new bar for efficiency and raw power, and the DIY route lets you tap into that performance without paying the “prebuilt tax.”
If you're looking for some build examples check out:
- Best Budget Gaming PC Builds Under $1000
- Top Custom PC Builds for Streaming, Gaming, and Content Creation
- Best PC Builds for Valorant
or check out Builds Section for more!
Performance & Value Gains Over Prebuilts
While companies like Alienware, NZXT BLD, and ASUS ROG have improved their prebuilts, they still carry a 15–30% markup over identical DIY parts lists. That extra cost often buys you proprietary parts, lower-grade motherboards, or cooling solutions that can bottleneck next-gen hardware.
In 2026’s market:
- NVIDIA RTX 50-series GPUs (e.g., RTX 5070 Ti, RTX 5090) and AMD Radeon RX 9000-series (e.g., RX 7800 XT, RX 9900 XTX) are pushing high-refresh 4K gaming into mainstream budgets.
- AMD Ryzen 9000-series CPUs (Ryzen 7 9700X, Ryzen 9 9950X) and Intel 15th-gen “Arrow Lake” chips (Core i7-15700K, Core i9-15900K) offer big IPC gains while improving power efficiency.
- PCIe Gen 5 SSDs like the Samsung 990 Evo and WD Black SN850X are delivering real-world speeds above 10 GB/s, cutting load times to near-instant.
Example Build Comparison (2026):
- DIY: Ryzen 7 7800X3D + RTX 5070 Ti + 32GB DDR5-6000 CL30 + 1TB PCIe Gen 5 SSD – ~$1,500
- Prebuilt: Same core specs, but with a locked motherboard and lower-tier PSU – ~$1,850–$2,000 (See on Amazon)
Upgrade Flexibility
Many 2026 prebuilts still ship with custom power connectors or non-standard motherboard layouts that limit upgrades. Building your own ensures:
- Standard ATX/ITX layouts for long-term compatibility.
- PSU headroom - for example, buying an 850W 80+ Gold unit now means you can upgrade from an RTX 5070 Ti to an RTX 5090 without replacing the PSU.
- DDR5 scalability - you can start with 32GB DDR5-6000 now and expand to 64GB or 128GB as workloads demand.
Future-proof tip: If you think you might step up to an RTX 5080 or RX 9800 XT in 2–3 years, choose a case with space for a 360mm radiator and a PSU with a native 16-pin PCIe 5.0 cable today.
Aesthetics & Customization Trends in 2026
DIY builds in 2026 are part performance machine, part centerpiece. Current design trends include:
- Dual-chamber cases like the Lian Li O11 Dynamic EVO XL and Hyte Y70 Touch for clean builds with no visible PSU clutter.
- ARGB ecosystems - Corsair iCUE and ASUS Aura Sync now integrate case fans, GPUs, RAM, and even SSD lighting.
- Premium airflow cases - Fractal North, NZXT H7 Flow, and Cooler Master MasterBox 600 maintain minimalist aesthetics while keeping high-wattage GPUs cool.
- White and pastel builds - White RTX 5090s, all-white NZXT Kraken AIOs, and custom cable kits are more available than ever.
- Vertical GPU mounts - not just for show; in some cases, it improves airflow around large triple-fan cards.
These aren’t just cosmetic - better case layouts mean lower thermals, quieter operation, and easier cleaning, extending component lifespan.
Step 1: Choosing Your Parts
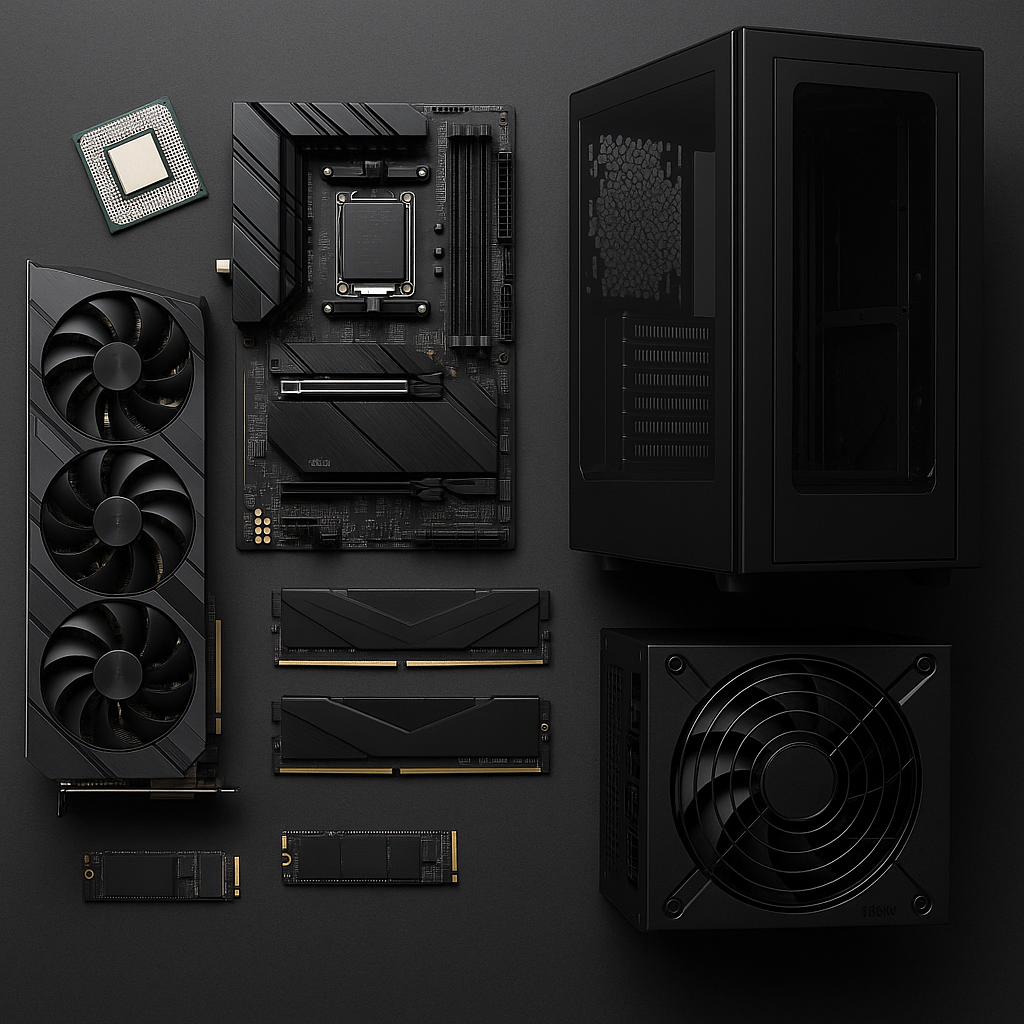
Every PC component plays a specific role in your build’s performance, aesthetics, and upgrade potential. Understanding what each does will make you a more confident builder and ensure you get the best return on your investment. Below, we’ll break down each part, explain its purpose, and recommend trusted, 2026-ready options.
CPU (Processor)
The CPU (Central Processing Unit) is your PC’s “brain,” responsible for executing instructions, running applications, and handling game logic. It influences overall system speed and how well your PC can multitask.
Entry-Level CPUs
Best for: Budget gaming at 1080p, general productivity, and light content creation.
- AMD Ryzen 5 9600X – 6-core, 12-thread chip with strong single-core performance for smooth gaming and light workloads.
- Intel Core i5-14600K – Hybrid architecture with performance and efficiency cores, great for balancing games and background apps. Why choose this tier: Entry-level CPUs give great gaming results when paired with a mid-tier GPU, and are ideal for those who don’t need workstation-level power.
Mid-Tier CPUs
Best for: High-FPS gaming at 1440p, streaming, and moderate video editing.
- AMD Ryzen 7 9800X3D – Features second-generation 3D V-Cache -stacked beneath the CPU cores—which boosts gaming performance by enabling higher clock speeds and more efficient thermal management compared to previous designs.
- Intel Core i7-14700K – Offers more cores for better multitasking, rendering, and streaming without sacrificing game performance. Why choose this tier: Mid-tier CPUs balance power and price, letting you handle both gaming and creative workflows smoothly.
Enthusiast / Pro CPUs
Best for: 4K gaming, professional content creation, and heavy multitasking.
- AMD Ryzen 9 9950X3D – 16 cores with massive cache for ultimate multi-threaded and gaming performance.
- Intel Core i9-14900K – Extremely high boost clocks for peak single-core and multi-core tasks. Why choose this tier: If you run demanding 3D rendering, editing, or simulation software alongside gaming, this level ensures zero bottlenecks.
For more CPU info check out:
GPU (Graphics Card)
The GPU (Graphics Processing Unit) renders visuals in games, videos, and 3D applications. It’s the most important component for gaming performance and creative workloads involving graphics.
Best for 1080p
Best for: Competitive esports, AAA gaming at medium-high settings, and budget-friendly rigs.
- NVIDIA GeForce RTX 5060 Ti – Excellent for esports titles with high FPS and ray tracing support.
- AMD Radeon RX 9060 XT – Strong 1080p performance with extra VRAM for future-proofing. Why choose this tier: Perfect for gamers with 1080p monitors or those who prioritize frame rates over ultra settings.
Popular models: ASUS Dual, MSI Ventus, Gigabyte Eagle.
Best for 1440p
Best for: High-refresh gaming, single-player AAA titles at ultra settings.
- NVIDIA GeForce RTX 5070 Ti – Smooth performance at 1440p, even in demanding games with ray tracing enabled.
- AMD Radeon RX 9070 XT – Great balance of performance, VRAM, and price for ultra settings at 1440p. Why choose this tier: Ideal if you own a 144Hz or 165Hz QHD monitor and want crisp visuals with high FPS.
Popular models: ASUS ROG Strix, MSI Gaming X Trio, Gigabyte AERO.
Best for 4K / High Refresh
Best for: Ultra settings in AAA games, pro video editing, and 3D rendering.
- NVIDIA GeForce RTX 5090 – Unmatched performance with 32 GB GDDR7, DLSS 4, and massive gains over previous gens—ideal for 4K ultra and heavy creative workloads.
- NVIDIA GeForce RTX 5080 – Near-flagship 4K performance and creative acceleration at a lower cost, powered by DLSS 4.
No current AMD RX card matches these GPUs in raw power or AI-driven features.
Memory (RAM)
RAM (Random Access Memory) is your system’s short-term data storage. It holds active processes, game assets, and application data so your CPU and GPU can access them quickly. The more and faster your RAM, the smoother your multitasking and the better your system handles demanding workloads.
Choosing RAM in 2026
With DDR5 now mature and affordable, it’s the standard for all modern builds. Lower latency (measured in CL) paired with higher speeds ensures faster response times in both gaming and professional workloads.
- 32GB DDR5-6000 CL30 – The sweet spot for gaming and general productivity. This configuration provides headroom for modern AAA titles, large open worlds, and background apps like Discord, OBS, or Chrome without performance dips.
- 64GB DDR5-6400 CL32 – Ideal for heavy content creation, including 4K/8K video editing, 3D modeling, Unreal Engine projects, and AI/ML workloads. Larger capacity means more data can be stored in RAM without paging to slower storage.
Pro Tip: Always check your motherboard’s QVL (Qualified Vendor List) to ensure the RAM kit you choose is tested for stability at its rated speed.
Storage (SSD & HDD)
Your storage determines how fast your system boots, how quickly games and apps load, and how smoothly large file transfers run. In 2026, PCIe Gen 5 NVMe SSDs deliver performance leaps, while SATA SSDs and HDDs remain viable for mass storage.
Primary Drive: PCIe Gen 5 NVMe SSD
A 1TB PCIe 5.0 NVMe SSD is perfect for your operating system, most-played games, and productivity software. These drives can reach up to 12,000 MB/s sequential read speeds, slashing load times to near-instant levels.
Examples: Samsung 990 Pro (Gen 4 but still top-tier for value), Corsair MP700 Pro, Crucial T700, Seagate FireCuda 540.
Secondary Drive: SATA SSD or HDD
For storing less speed-sensitive files (like movies, backups, or older games) a 2–4TB SATA SSD offers large capacity and solid performance. HDDs remain the cheapest per terabyte for bulk storage. Examples:
- SATA SSDs: Crucial MX500, Samsung 870 EVO, WD Blue 3D NAND.
- HDDs: Seagate Barracuda, WD Red Plus (NAS or long-term storage use).
Pro Tip: If you work with large video files or massive game libraries, consider a second NVMe SSD instead of an HDD to keep transfers and asset streaming fast.
Motherboard (Chipsets & Features)
The motherboard is the backbone of your PC - it connects every component, routes power, and determines your upgrade potential. Choosing the right board can mean the difference between a build that lasts two years and one that stays relevant for five.
Recommended motherboard brands: ASUS, MSI, Gigabyte.
When shopping for a 2026 motherboard, focus on these key factors:
1. Chipset & Socket Compatibility
The chipset determines what CPUs you can use and which features are available.
- For AMD builds in 2026, look at X870E and B850 chipsets (AM5 socket) for Ryzen 9000-series CPUs.
- For Intel builds, focus on Z890 and B860 (LGA 1851 socket) for 15th-gen Core processors.
Higher-end chipsets like X870E or Z890 provide more PCIe lanes, better overclocking support, and advanced connectivity.
2. PCIe 5.0 Expansion
If you want your build to handle future GPUs and blazing-fast SSDs, PCIe 5.0 x16 slots are a must. These double the bandwidth of PCIe 4.0, ensuring no bottlenecks for next-gen graphics cards like the RTX 5090 or RX 9070 XT.
3. M.2 Storage Support
Look for boards with at least two to three M.2 NVMe slots, preferably PCIe 5.0 compatible for maximum SSD speeds. More slots mean you can expand your storage without relying on slower SATA drives.
4. Power Delivery (VRMs)
A motherboard’s VRMs (Voltage Regulator Modules) control how cleanly and efficiently your CPU gets power. For high-core CPUs like the Ryzen 9 9950X3D or Core i9-15900K, you’ll want robust, well-cooled VRM designs with 14–18 phases to maintain stability under heavy workloads.
5. Connectivity & I/O
- Wi-Fi 6E or Wi-Fi 7 for ultra-fast, low-latency wireless.
- 2.5GbE or 10GbE LAN for wired speed.
- USB 3.2 Gen 2x2 (20Gbps) Type-C for modern peripherals and fast external storage.
- Front-panel USB-C headers for modern PC cases.
6. Form Factor
Choose ATX for the best balance of expandability and compatibility, micro-ATX for smaller builds without sacrificing too much, or mini-ITX for ultra-compact systems where space is at a premium.
Trusted 2026 Motherboard Picks
- ASUS ROG Crosshair X870E Hero – Premium AM5 board with PCIe 5.0 GPU and SSD support, Wi-Fi 7, and top-tier VRMs.
- MSI MEG Z890 ACE – High-end Intel board with triple M.2 PCIe 5.0 slots, advanced cooling, and DDR5-8000+ support.
- Gigabyte AORUS Master X870E – Feature-packed AMD option with reinforced PCIe 5.0 slots and robust overclocking potential.
- ASRock Taichi Lite Z890 – A more budget-conscious enthusiast board with strong VRMs and next-gen connectivity.
PSU (Power Supply)
The PSU is your PC’s lifeline - it converts wall power into the stable, regulated electricity your components need. A high-quality unit protects your investment, ensures consistent performance, and can last through multiple upgrades. In 2026, with GPUs like the RTX 5070 Ti, RTX 5090, and RX 9070 XT demanding more power than ever, your PSU choice matters just as much as your CPU or GPU.
Why PSU Quality Matters
- Stability: A good PSU keeps voltages steady, preventing random reboots, crashes, or degraded performance under load.
- Safety: Quality models include protections such as Over Voltage Protection (OVP), Over Current Protection (OCP), Short Circuit Protection (SCP), and Over Power Protection (OPP).
- Longevity: A premium PSU can last 7–10 years, often outliving the rest of your build.
- Efficiency: Higher efficiency means less wasted energy, less heat, and quieter operation.
Efficiency Ratings
- 80+ Gold: The standard for most builds - 87–90% efficient under load.
- 80+ Platinum / Titanium: Higher efficiency (92–96%), ideal for high-end or always-on systems where heat and noise need to be minimized.
Higher efficiency also helps keep PSU fans running slower, which means quieter operation over time.
Modularity
- Fully Modular: All cables are removable, making it easy to install only what you need for cleaner cable management.
- Semi-Modular: Some cables (like motherboard and CPU power) are fixed, but extras are removable. For most modern builds, fully modular is worth the slight cost increase for the cleaner build and improved airflow.
Wattage Guidance for 2026 Builds
- 650–750W: Ideal for mid-range systems using GPUs like the RTX 5060, RTX 5070 or RX 9060 XT.
- 850–1000W: Best for high-end cards like the RTX 5080 or RX 9070 XT, especially if you plan to overclock.
- 1200W–1500W: Recommended for extreme builds with the RTX 5090 or multi-GPU workstation setups, where peak loads can spike well above 1,000W.
Pro Tip: Always choose a PSU with about 20% more capacity than your estimated max load. This keeps it running in its most efficient range and ensures headroom for upgrades.
Connector Considerations in 2026
High-end GPUs now use the 12V-2×6 (16-pin) PCIe 5.0 connector, capable of delivering up to 600W through a single cable. Look for PSUs that come with native PCIe 5.0 cables rather than relying on bulky adapters — this is now standard on most ATX 3.0 units from leading brands.
Trusted PSU Models & Brands
- Corsair HX1500i – Platinum-rated, whisper-quiet, built for extreme builds like an RTX 5090 with overclocking headroom.
- Seasonic Prime TX-1000 – Premium 1,000W Platinum PSU with excellent voltage regulation and ultra-low ripple.
- ASUS ROG Thor 850P II – 850W Platinum-rated with OLED power display and fully modular cables.
- be quiet! Pure Power 12 750W – Compact, high-quality 750W Gold PSU perfect for mid-range RTX 5070 Ti or RX 9070 XT builds.
Case (Airflow, Size, and Features)
The case is more than just a shell for your components - it dictates airflow efficiency, cooling potential, ease of assembly, and the overall look of your PC. In 2026, cases have become smarter, quieter, and more modular, giving builders more options than ever.
Why the Case Matters
- Thermal Performance: A case with poor airflow can cause higher component temperatures, reducing performance and longevity.
- Ease of Building: Modern cases offer tool-less panels, removable drive cages, and well-placed cable routing channels that make assembly far less frustrating.
- Aesthetics: Cases now come in a variety of styles - from minimalist and living-room-friendly to full-on RGB showcases.
- Upgrade Potential: A well-designed case leaves space for future GPUs, extra drives, or larger coolers.
Size Considerations
- Mid-Tower ATX: The sweet spot for most builders — supports standard ATX motherboards, large GPUs, and big coolers without taking up excessive desk space.
- Full-Tower: Ideal for extreme builds with custom water loops or multiple GPUs.
- Micro-ATX / Mini-ITX: Compact and portable but require careful part selection for clearance and cooling.
Key Features to Look For
- Front Mesh Panels: Maximizes fresh air intake while helping keep temps lower.
- Dust Filters: Essential for keeping internals clean — ideally removable for easy washing.
- Cable Management Channels & Tie Points: Keeps cables neat, improving airflow and aesthetics.
- Radiator & Fan Support: Check for at least 240mm support in front or top for AIOs.
- GPU Clearance: Ensure it fits the largest GPU you might consider now or in the future.
- Tempered Glass Panels: For showing off your components while maintaining durability.
When to Choose Which Case Style
- Airflow-Focused: If you’re running high-performance GPUs/CPUs and want low temps.
- Silent Design: For offices or bedrooms — uses sound-dampening panels but may sacrifice airflow.
- Showcase Builds: For RGB-heavy setups with a glass panel to display your work.
Recommended Models
- ASUS Prime AP201: Compact mATX case with excellent airflow and cable management in a small footprint.
- NZXT H7 Flow: Minimalist mid-tower with strong airflow thanks to a perforated front panel.
- Fractal Design Meshify 2: Spacious, airflow-focused design with a modular interior for maximum versatility.
Pro Tip: Your case is the easiest part to keep for multiple build generations. Invest in one with good airflow, solid build quality, and enough clearance to handle future upgrades — it will serve you for years.
Cooling (Air vs. AIO Liquid)
Your CPU cooling choice affects performance, noise levels, and even the overall look of your build. In 2026, both air coolers and AIO (all-in-one) liquid coolers are highly capable — the decision often comes down to your performance needs, case layout, and personal preferences.
Air Coolers
Air coolers use a heatsink and one or more fans to draw heat away from the CPU. They’ve been the standard for decades, and for good reason.
Why choose air cooling:
- Reliability: Fewer moving parts means less risk of mechanical failure. No pumps, no liquid — just fans and metal.
- Low Maintenance: Aside from occasional dust cleaning, they require almost no upkeep.
- Value for Performance: High-end air coolers can rival AIOs in cooling ability at a lower cost.
- Longevity: With proper care, a good air cooler can last through multiple CPU upgrades.
When it’s best:
- You want quiet, consistent cooling for gaming or productivity.
- You’re building in a smaller case without space for radiators.
- You value reliability over aesthetics.
Examples: Noctua NH-D15, be quiet! Dark Rock Pro 5, DeepCool Assassin IV.
AIO Liquid Coolers
AIOs circulate coolant between a CPU water block and a radiator to dissipate heat. They’re sealed units, meaning you don’t refill or maintain the liquid.
Why choose AIO cooling:
- High Cooling Potential: Larger radiators (240mm, 280mm, 360mm) can handle more thermal load, especially under sustained heavy workloads or overclocking.
- Aesthetics: Sleek CPU block designs and customizable RGB lighting can make your build look cleaner and more modern.
- Better Clearance: Without a large heatsink over the CPU socket, you have more space for tall RAM modules or unique case layouts.
- Ideal for High TDP CPUs: Top-tier processors like the Ryzen 9 9950X or Core i9-14900K benefit from the extra thermal headroom.
When it’s best:
- You’re running high-performance CPUs and plan to overclock.
- You want a cleaner interior look for glass-panel or showcase builds.
- You have a case that supports large radiator mounts (240mm–360mm).
Examples: Corsair iCUE H150i, ASUS ROG Ryujin III, MSI MEG CoreLiquid S360.
Step 2: Essential Tools & Workspace Prep
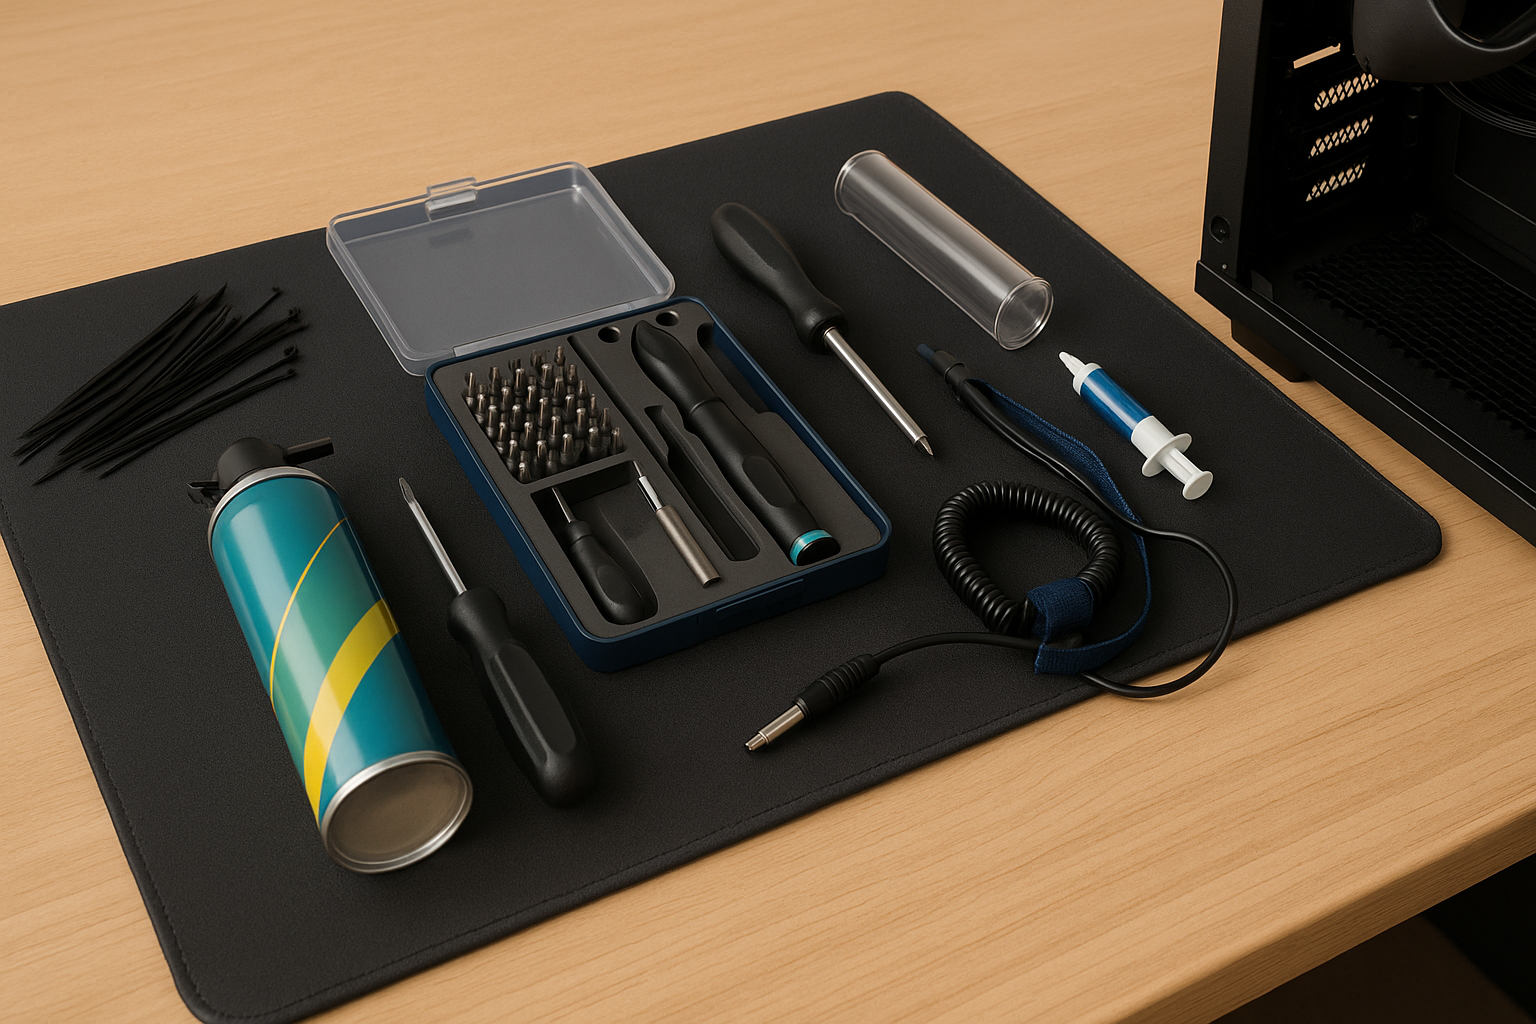
A great build starts before you even unbox a single component. Having the right tools and workspace setup can make the difference between a smooth build and a frustrating afternoon of dropped screws and tangled cables.
Must-Have Tools
You don’t need a massive toolkit to build a PC in 2026, but a few essentials will make the process cleaner, safer, and faster:
- Phillips #2 Screwdriver – The workhorse of PC building. A magnetic tip helps prevent dropped screws inside tight cases.
- Small Phillips #1 Screwdriver – For M.2 SSD screws and motherboard standoffs.
- Anti-static Wrist Strap – Optional, but adds peace of mind for avoiding static discharge damage.
- Cable Ties or Velcro Straps – Keeps cables organized for better airflow and a cleaner look.
- Thermal Paste – Most coolers come with paste pre-applied, but having extra on hand is smart.
- Flashlight or Headlamp – Helpful for seeing inside cases, especially when working with dark components.
- Compressed Air or Electric Duster – Clears dust from cases and keeps components clean during assembly.
Pro Tip: If you plan to build more than once, consider adding a precision screwdriver set to your kit — it makes working with smaller screws and connectors much easier.
Anti-Static Precautions
While modern components are more resistant to static than they used to be, it’s still best to take precautions. A small static discharge can silently damage sensitive hardware.
- Ground Yourself Frequently – Touch an unpainted metal part of your case before handling components.
- Avoid Carpeted Surfaces – Carpets build static quickly; use a hard surface instead.
- Work on a Non-Conductive Surface – A clean desk or dedicated anti-static mat works best.
- Handle Components by the Edges – Avoid touching connector pins or contact pads.
Ideal Workspace Setup
Think of your workspace as your PC building “arena.” The more organized and clear it is, the smoother your build will go.
Key Setup Tips:
- Plenty of Space – Aim for a desk or table at least 4 feet wide so you can lay out all your parts without stacking them.
- Good Lighting – Bright overhead lighting plus a desk lamp will help you see small headers and connectors.
- Clear Zones – Keep one area for unpacking, one for assembly, and one for temporarily storing unused parts.
- Nearby Power Source – Makes it easy to do a quick power-on test before finalizing the build.
Bonus Tip: Keep your motherboard manual nearby — you’ll reference it more often than you expect.
Step 3: Building Your PC – Quickstart
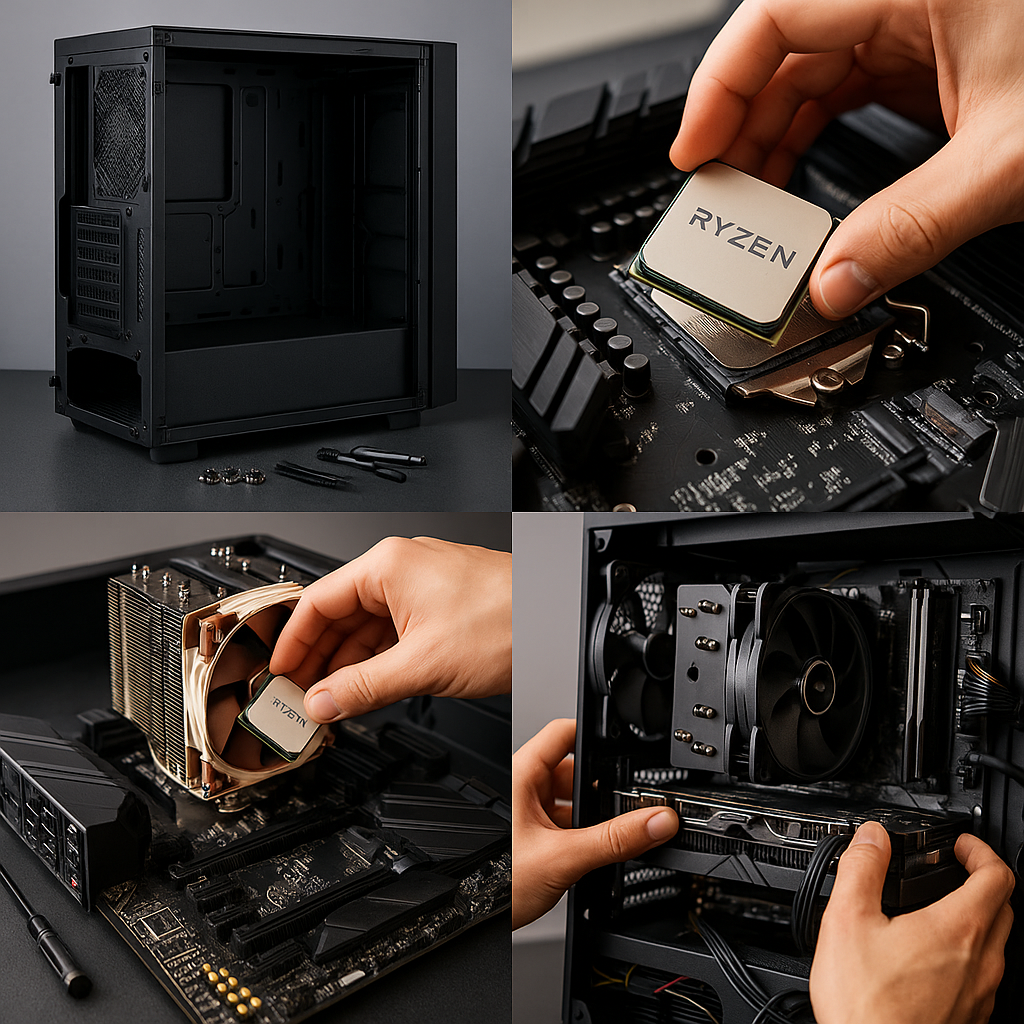
If you’ve got all your parts and tools ready, here’s the short version of how to get your system from boxes to boot screen. Think of it as your PC build cheat sheet.
1. Prep Your Case
- Remove both side panels.
- Set aside screws, cable ties, and included accessories.
- Make sure all pre-installed standoffs match your motherboard size.
2. Install the CPU
- Open the CPU socket latch.
- Align the notches on the chip with the socket and gently lower it in place.
- Lock the latch without forcing it.
3. Install the Cooler
- If needed, apply a pea-sized dot of thermal paste.
- Mount the cooler per its bracket system (air or liquid).
4. Add RAM & Storage
- Insert RAM sticks into the correct slots until they click.
- Install M.2 SSDs and secure with their small screws.
5. Mount the Motherboard
- Align with the I/O shield and standoffs.
- Secure with the provided screws.
6. Install the GPU
- Seat the GPU into the top PCIe slot until it clicks.
- Secure with screws or case retention bracket.
7. Connect the PSU & Cables
- Motherboard 24-pin power.
- CPU 8-pin (or 4+4 pin) power.
- GPU power cable(s).
- SATA or NVMe power for storage (if applicable).
8. First Boot Test
- Connect monitor, keyboard, and power.
- Turn it on and confirm POST (Power-On Self-Test) before installing your OS.
Want the detailed walkthrough with pictures and troubleshooting tips?
Check out our GeekaWhat's PC Build Guide on youtube.
Or for some laughs and what not to do check out the Verge's "Build"
Step 4: Pro Tips & Optimization
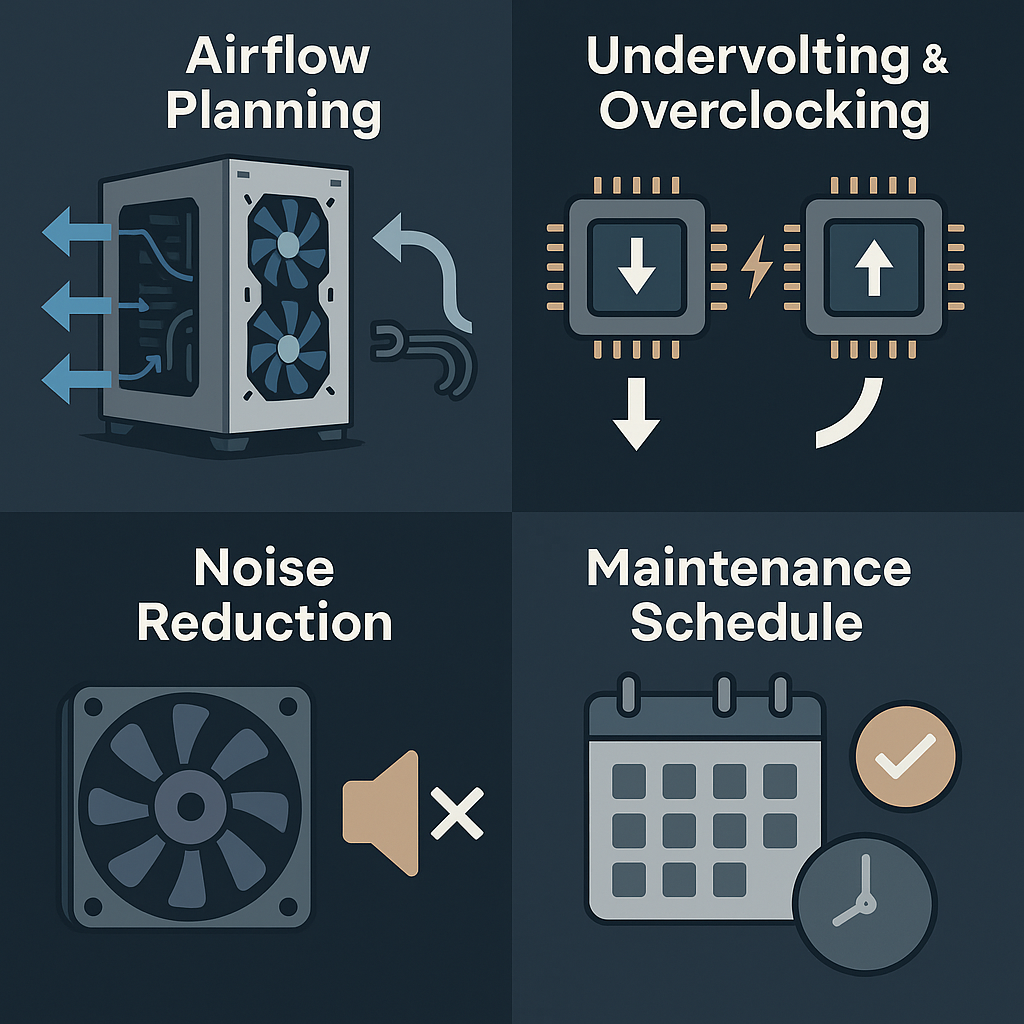
Once your PC is running, it’s time to fine-tune it for performance, longevity, and comfort. These optimizations can help you get the most out of your build without spending another dollar.
Airflow Planning
Good airflow isn’t just about cooler temps — it directly impacts stability, noise levels, and hardware lifespan.
- Positive Pressure Setup – Aim for slightly more intake fans than exhaust. This helps push dust out through small openings instead of sucking it in.
- Fan Placement Rule – Front and bottom = intake, rear and top = exhaust.
- Cable Management – Clear airflow paths by routing cables behind the motherboard tray. Even small obstructions can raise temps a few degrees.
- GPU Orientation – Large triple-fan GPUs benefit from adequate clearance; if space is tight, consider vertical mounting for better breathing room.
Pro Tip: Use your motherboard’s fan curve settings to ramp up airflow under load and keep noise low at idle.
Undervolting & Overclocking
Both can be performance optimizations — just from opposite angles:
- Undervolting – Reduces power draw and heat without sacrificing noticeable performance. Particularly effective for high-power GPUs and CPUs.
- Overclocking – Increases clock speeds for more performance, but watch temps and stability.
- Safe Approach – Adjust in small increments, stress-test, then repeat. Monitor temps with software tools to ensure safe operating ranges.
In 2026, many modern CPUs and GPUs auto-adjust to workload demands, so manual tweaking is less critical — but careful tuning can still net you a few extra frames or a quieter machine.
Noise Reduction Techniques
A powerful PC doesn’t have to sound like a jet engine.
- Fan Curves – Create custom profiles so fans only spin up when temps truly need it.
- Quality Fans – Swap stock case fans for higher-quality, low-noise models.
- Vibration Dampening – Use rubber grommets for case fans and drives to reduce rattling.
- Case Choice – Cases with sound-dampening panels or front mesh filters can balance airflow and acoustics.
Maintenance Schedule
Keeping your system clean and updated will extend its lifespan and keep performance consistent.
- Monthly – Light dusting of intakes and exhausts. Check temps for any sudden changes.
- Every 6 Months – Deep clean fans, filters, and heatsinks with compressed air.
- Annually – Reapply thermal paste to CPU (and GPU if accessible), especially in high-performance systems.
- Ongoing – Keep BIOS, GPU drivers, and OS updates current for optimal performance and security.
Pro Tip: Set calendar reminders for cleaning and updates — maintenance is easy to forget until something overheats.
Final Thoughts
Longevity & Future-Proofing
When you build a PC in 2026, you’re not just buying performance for today—you’re investing in a platform that can handle the next 5+ years of games, software, and workloads. Choosing a current-gen CPU, a GPU with enough VRAM, and a motherboard that supports PCIe 5.0 ensures you can upgrade individual parts without replacing the whole system. Opt for higher-wattage PSUs and cases with extra airflow capacity now, and you’ll thank yourself when the next wave of more power-hungry GPUs or larger CPU coolers arrives.
Building vs. Upgrading
If your current system still performs decently, a strategic upgrade—like adding a faster GPU, doubling your RAM, or swapping in a PCIe Gen 5 SSD—can breathe new life into your setup without the cost of a full rebuild. But if you’re working with older platforms (pre-PCIe 4.0, DDR4 memory, or GPUs with less than 8GB VRAM), a full build is often the smarter choice for long-term performance and compatibility. Newer architectures bring not just raw speed but also efficiency improvements, modern connectivity, and better feature support for gaming and content creation.
Bottom line: Whether you’re assembling your first PC or replacing a decade-old rig, a well-planned build in 2026 is about balancing present needs with tomorrow’s demands. The right parts today mean you won’t be scrambling for a full rebuild two years from now.
FAQs
Is it cheaper to build a PC or buy one in 2026?
Yes. In 2026, building your own PC typically saves 15–30% compared to prebuilts with the same parts. Prebuilt systems often use lower-quality motherboards, cooling, and power supplies, which can limit performance and future upgrades. DIY builds let you choose higher-end parts without paying the “prebuilt tax.”
How much does it cost to build a good gaming PC in 2026?
A strong gaming PC in 2026 usually costs between $900–$1,500. Budget builds around $900–$1,100 are perfect for high-FPS 1080p gaming, while $1,200–$1,500 builds unlock 1440p Ultra performance with GPUs like the RTX 5070 Ti or RX 9070 XT. High-end builds exceed $2,000 but are best for 4K or heavy content creation.
What parts do I need to build a custom PC in 2026?
At minimum, you’ll need a CPU, GPU, motherboard, RAM, storage (SSD), case, and power supply. Optional upgrades include better cooling (air or AIO), additional NVMe drives, and airflow-focused cases. For future-proofing in 2026, look for PCIe 5.0 support, DDR5 RAM, and a PSU with a native 16-pin PCIe 5.0 GPU cable.
Editorial Team
Every guide on pcbuildhelper is created by our editorial team of experienced PC builders, gamers, and engineers. We combine hands-on testing, community insights, and trusted industry data to make sure our recommendations are practical, accurate, and up to date. While we use AI to assist with research and formatting, all final content is reviewed and validated by our human team to ensure clarity and trustworthiness.
Related Articles

Best MMO and MOBA Gaming Mice with Extra Programmable Buttons
Discover the best MMO and MOBA gaming mice with extra programmable buttons in 2025. From high‑button configurations to low latency wireless, find your gear here.
Jan 8, 2026
Inside Case Tech: Best Mini‑ITX Cases for Compact Gaming Setups
Discover the top Mini‑ITX cases of 2026 optimized for compact gaming builds. This guide covers cases with superior cooling, easy assembly, aesthetics, and portability.
Jan 8, 2026

Best $1500 Gaming PC Build 2026 – Ryzen 7 7800X3D & RTX 5070 (1440p/4K Ready)
Create a powerful $1500 gaming PC in 2026 using the Ryzen 7 7800X3D and RTX 5070 to dominate 1440p Ultra, enjoy smoother 4K, and stay set for future upgrades.
Jan 8, 2026

Best Mid‑Range GPUs for Ray Tracing in 1080p/1440p — Value Picks for 2026
Discover the most cost‑effective mid‑range GPUs that deliver excellent ray tracing performance at 1080p and 1440p in 2025. Compare AMD RDNA 4 and Nvidia Blackwell options like RX 9060 XT, RX 9070, RTX 5060 Ti, RTX 5070, and Intel Arc B580—you’ll get actionable advice to choose the best GPU for your budget.
Jan 8, 2026
RTX 5070 Ti vs RX 9070 XT (2026) – Best GPU for 1440p, 4K & Esports
Compare RTX 5070 Ti vs RX 9070 XT in 2026. Benchmarks, FPS, pricing, and features to find the best GPU for 1440p, 4K gaming, ray tracing, and esports.
Jan 8, 2026